Fluent-bit natively supports forwarding data to Event Hubs with Kafka support built in with the Linux packages. With Windows, this module was left out of the standard package simply because no testing against the Apache kafka redistributable had occurred.
Using Fluent-bit with Windows and ADX provides a cost effective way of harvesting large amounts of security data from monitored systems.
Official installers for the latest fluent-bit package are available for download here:
https://docs.fluentbit.io/manual/installation/windows
For Windows Installations MSI installers would normally be preferred as it creates a service running as the system account (needed for Security logs). The official package doesn't conform to the development standards that make an MSI useful so the package should only be used for testing as the goal is to create an enterprise package with an expanded set of modules.

Fluent-bit has multiple supported modules for Windows but they aren’t downloadable in a simple package. Organisations have to select the libraries they want from source code for making an internal package for distribution.
Compiling Modules
The latest source code can be downloaded from:
https://github.com/fluent/fluent-bit/releases
A zip file is fine for obtaining the source. This needs to be extracted to a local directory for compilation.
Instructions for a Windows build are found here:
https://docs.fluentbit.io/manual/installation/windows
Preparation
First, you need Microsoft Visual C++ to compile Fluent Bit. You can install the minimum toolkit by the following command:
wget -o vs.exe https://aka.ms/vs/16/release/vs_buildtools.exe
start vs.exe
When asked which packages to install, choose "C++ Build Tools" (make sure that "C++ CMake tools for Windows" is selected too) and wait until the process finishes.
https://visualstudio.microsoft.com/downloads/#build-tools-for-visual-studio-2022

Also you need to install flex and bison. One way to install them on Windows is to use winflexbison.
wget -o winflexbison.zip https://github.com/lexxmark/winflexbison/releases/download/v2.5.22/win_flex_bison-2.5.22.zip
Expand-Archive winflexbison.zip -Destination C:\WinFlexBison
cp -Path C:\WinFlexBison\win_bison.exe C:\WinFlexBison\bison.exe
cp -Path C:\WinFlexBison\win_flex.exe C:\WinFlexBison\flex.exe
Add the path C:\WinFlexBison to your systems environment variable "Path". Here's how to do that.
It is important to have installed OpenSSL binaries, at least the library files and headers. These can be installed by Chocolatey:
choco install -y openssl
Alternately, the latest version may be compiled from source:
OpenSSL will contain a small number of libraries, these need to be located on the target machine.

There is an annoying bug that the project compile will fail for not being able to locate the OpenSSL binaries.

The OpenSSL libraries are expected to be copied to the Visual C runtime location. This can be in one of two places depending on which tool is used to bulld the project.
Command-line Cmake is located under “buildtools”
C:\Program Files (x86)\Microsoft Visual Studio\2022\BuildTools\VC\Tools\MSVC\14.39.33519\lib\x64

Whereas Visual Studio uses its own tools path location:

Compilation
Open the start menu on Windows and select the native tools command prompt for the system ( x86 or x64).

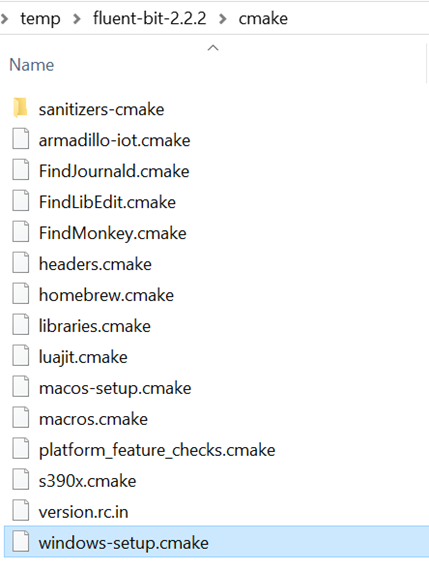
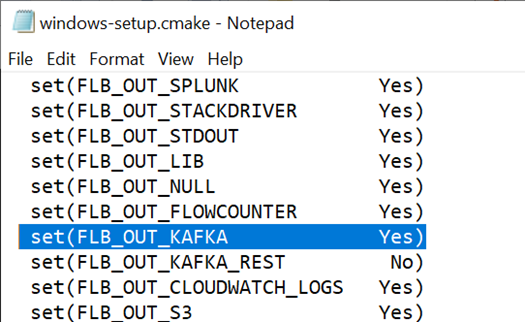
Kafka output is a module that hadn’t been formally tested with Windows so the fluent-bit developers left it out by default. We need to put it back in by editing the file:
..\fluent-bit-2.2.2\cmake\windows-setup.cmake

Change the fluent-bit out module for Kafka to yes.

Now from the build directory run:
C:\temp\fluent-bit-2.2.2\build>cmake ..
And create a build for the application.
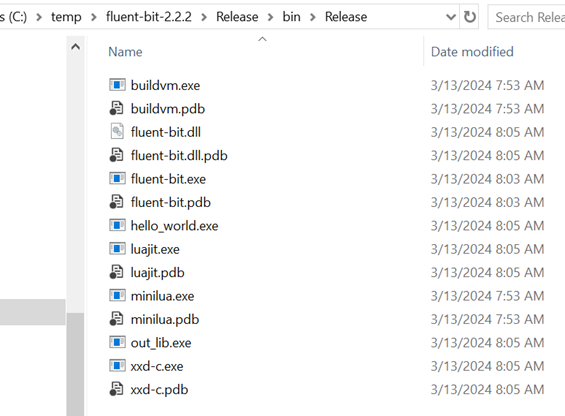
C:\temp\fluent-bit-2.2.2\build>cmake --build . --config Release
Note that without the config setting, cmake will create a debug version of the project which may be useful if you encounter errors.

New binaries need to be copied to C:\Program Files\fluent-bit\bin

Note that use of the Kafka plugin with Windows requires as a dependency, compiled librdkafka modules that may be obtained via nuget: https://www.nuget.org/packages/librdkafka.redist/
Download the nuget file and extract the dlls into the fluent-bit bin directory.

Restart the service.
Step 2: Configuring Fluent Bit
All we need now is to configure Fluent Bit to process logs and forward them to our Event Hub.
Configuration File
Get started quickly with this configuration file for fluent-bit:
vi /etc/fluent-bit/fluent-bit.conf
IMPORTANT fluent-bit uses 4 x spaces for indenting. If this is not followed, the service will not start. Ensure that all properties under “[OUTPUT]” are preceeded by 4 spaces!
[OUTPUT]
   Name        kafka
   Match       *
   brokers     adxeventhub.servicebus.windows.net:9093
   topics      fluentbit-logs-syslog
   rdkafka.security.protocol   SASL_SSL
   rdkafka.sasl.username       $ConnectionString
   rdkafka.sasl.password        Endpoint=sb://adxeventhub.servicebus.windows.net/;SharedAccessKeyName=fluentbit-windows-test;SharedAccessKey=Vgtxi+m0o66cLRfozj0fMXXXXXXXXXXXXXXXXXXXEntityPath=fluentbit-logs-windows
 rdkafka.sasl.mechanism      PLAIN
With Fluen-bit restarted, event data will start flowing to the configured Event Hub.
- Log in to post comments