Azure Function Apps can leverage OpenID Connect to exchange Microsoft-issued tokens for AWS tokens. By utilizing the AWS Security Token Service (AWS STS), you can eliminate the need to manage expiring keys, streamlining automation solutions that interact with AWS.
In this blog, we’ll walk through the process of integrating AWS STS with an Azure App Registration, an Enterprise Application, and a User-Defined Managed Identity to enable Function App automation.
Step 1: Create a New App Registration
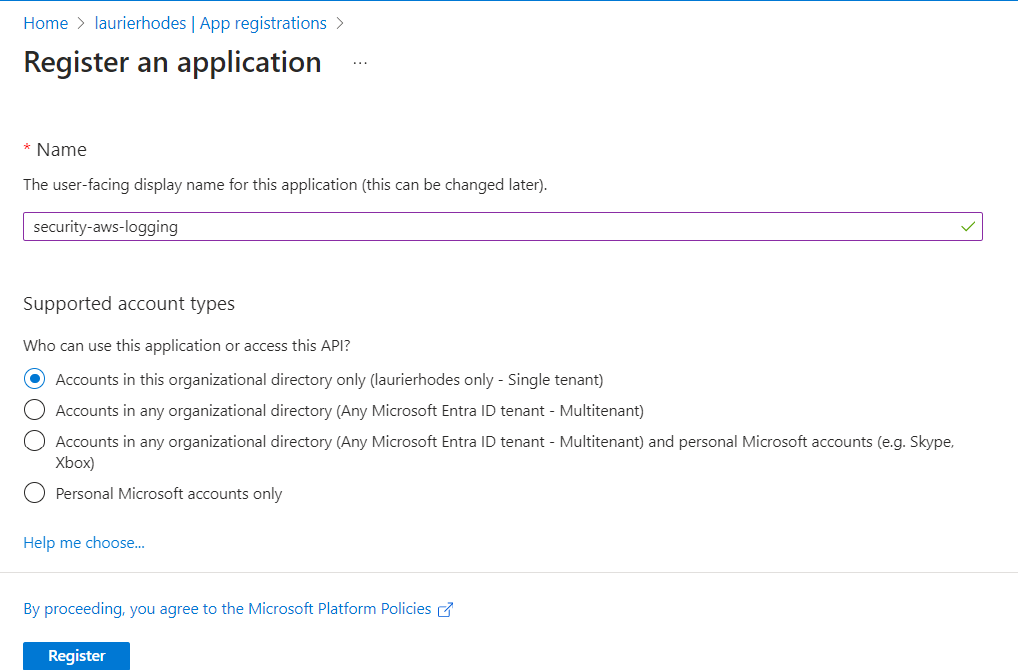
In the Azure portal, create a new App Registration with a meaningful name that clearly signifies its purpose. Leave the supported account types as "Accounts in this organizational directory only."
On the newly registered application’s overview page, select Application ID URI, then click Add.
Configure the Application ID URI:

For ease of management, replace the automatically generated GUID with a custom identifier that matches the application name. This URI will be the audience used when interacting with AWS.

Next, assign a role to the application. This role will be used with the AWS AssumeRoleWithWebIdentity service.
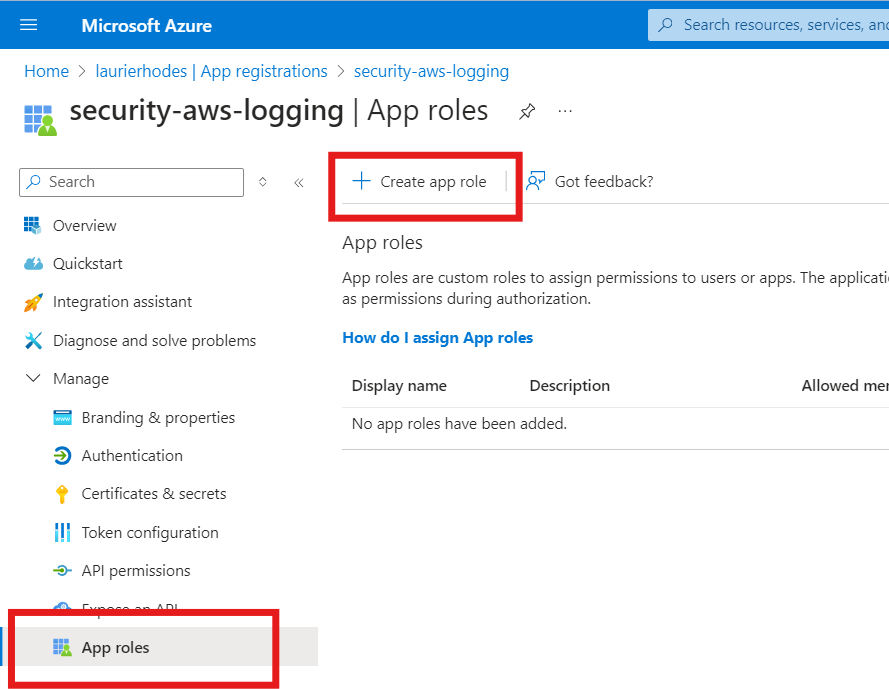
We are going to create an Assume Role with Web Identity. AWS documentation may be found here [AssumeRoleWithWebIdentity - AWS Security Token Service]
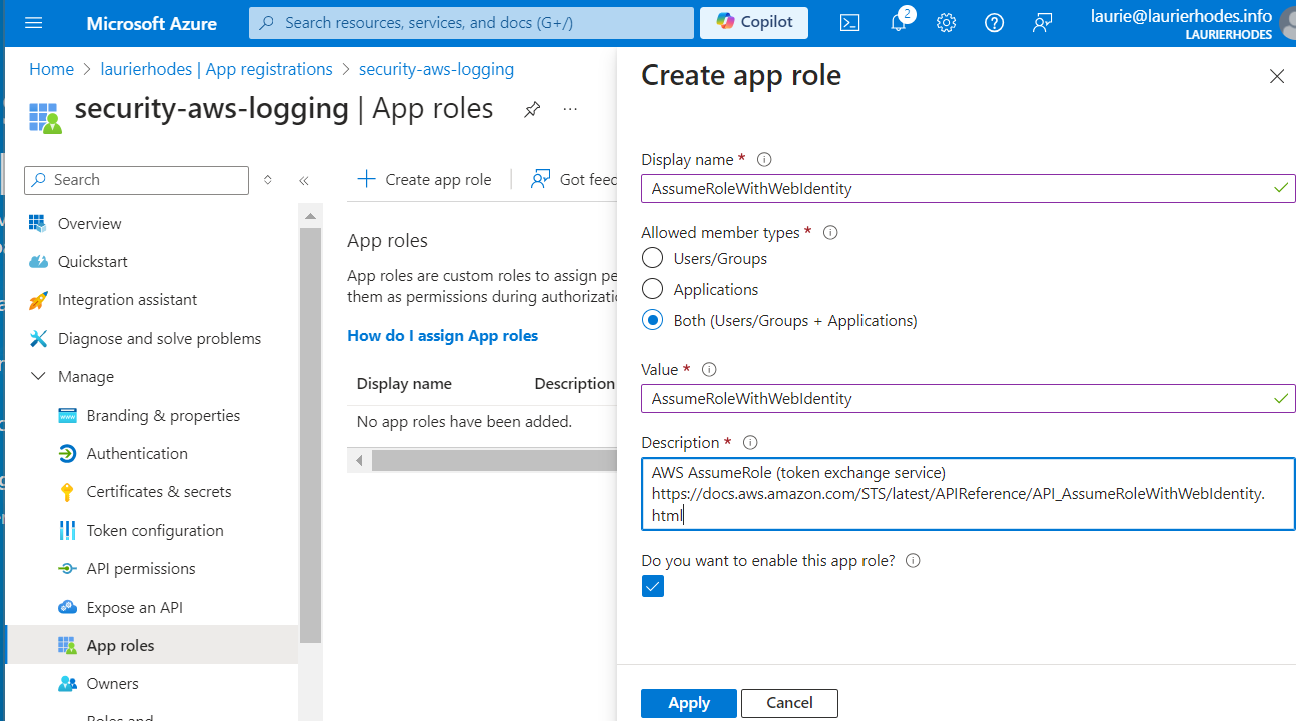
Select Users and Groups as the allowed member types.
The role value must be set to: AssumeRoleWithWebIdentity.
Step 2: Create a Managed Identity
It’s recommended to create a User-Defined Managed Identity instead of using an identity generated by application deployment. This approach allows the identity to persist even if the application is deleted, and the same identity can be reused across multiple Function Apps.
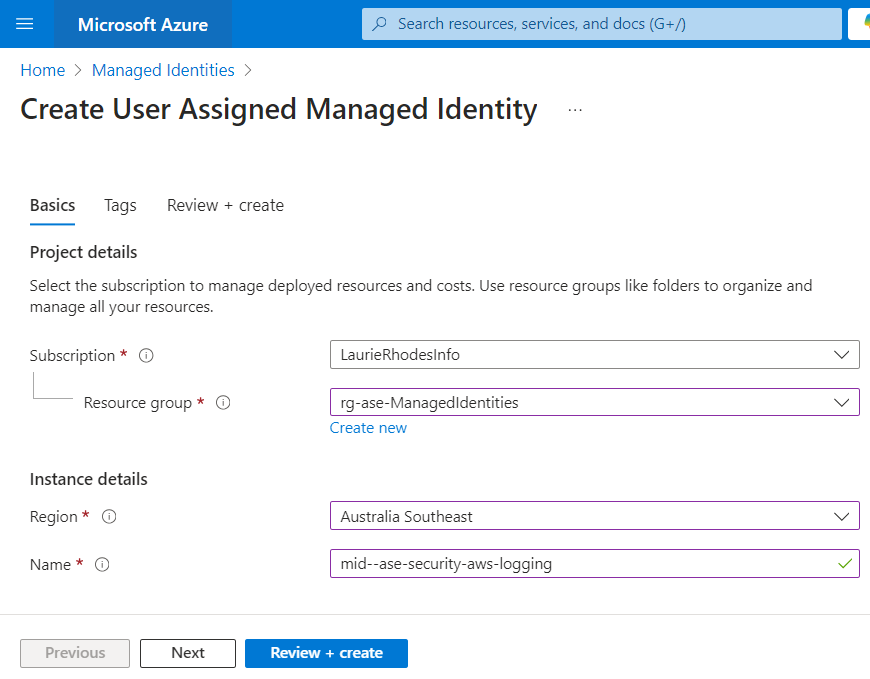
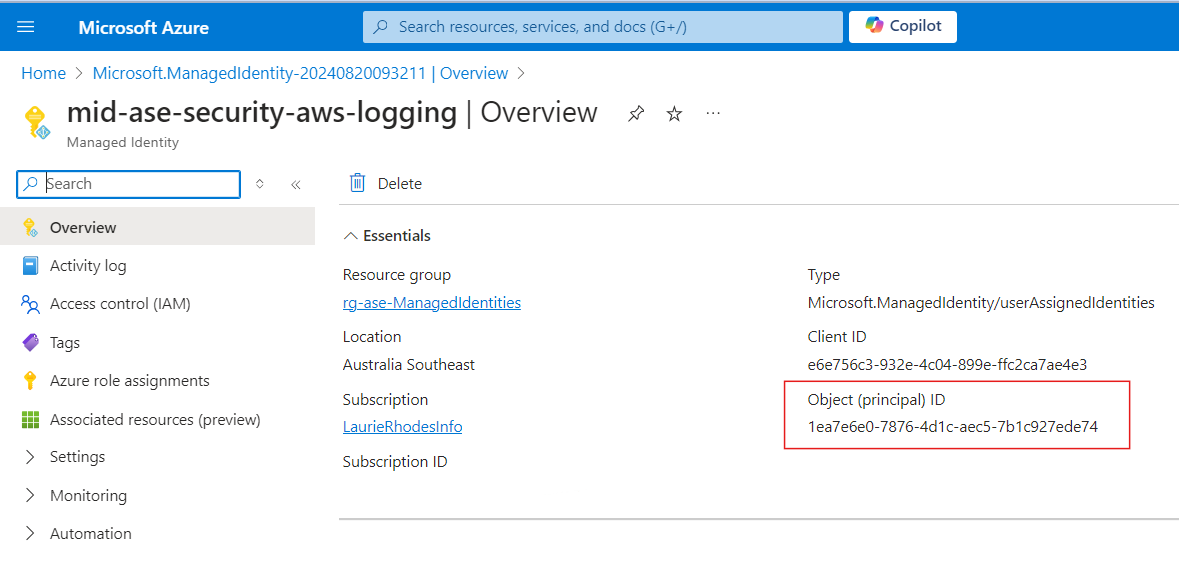
Once the Managed Identity is created, navigate to the Overview blade and copy the Object ID to notepad.
Step 3: Assign the Managed Identity to the App Role
Return to your App Registration and note its name. Whenever permissions are applied to an Azure App Registration, they are applied to an Enterprise Application (also known as a Service Principal).
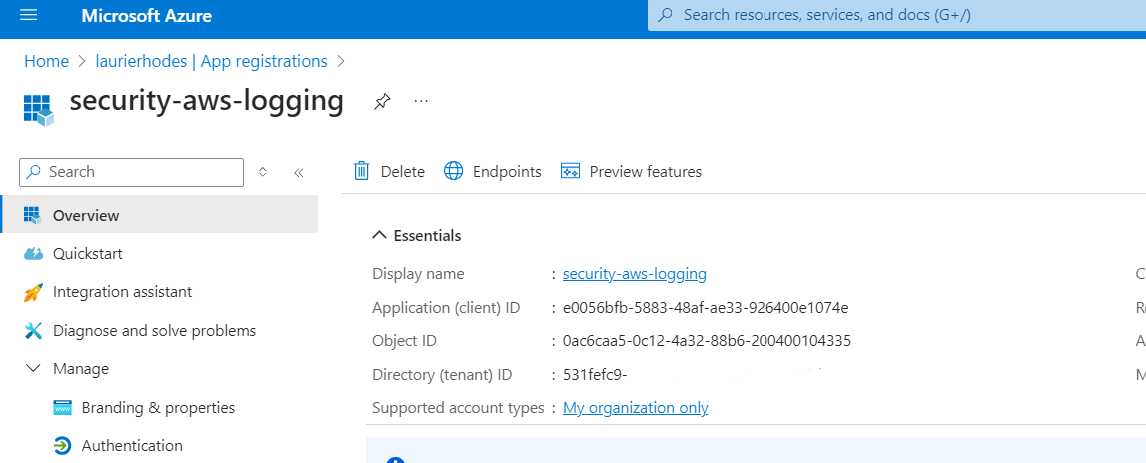
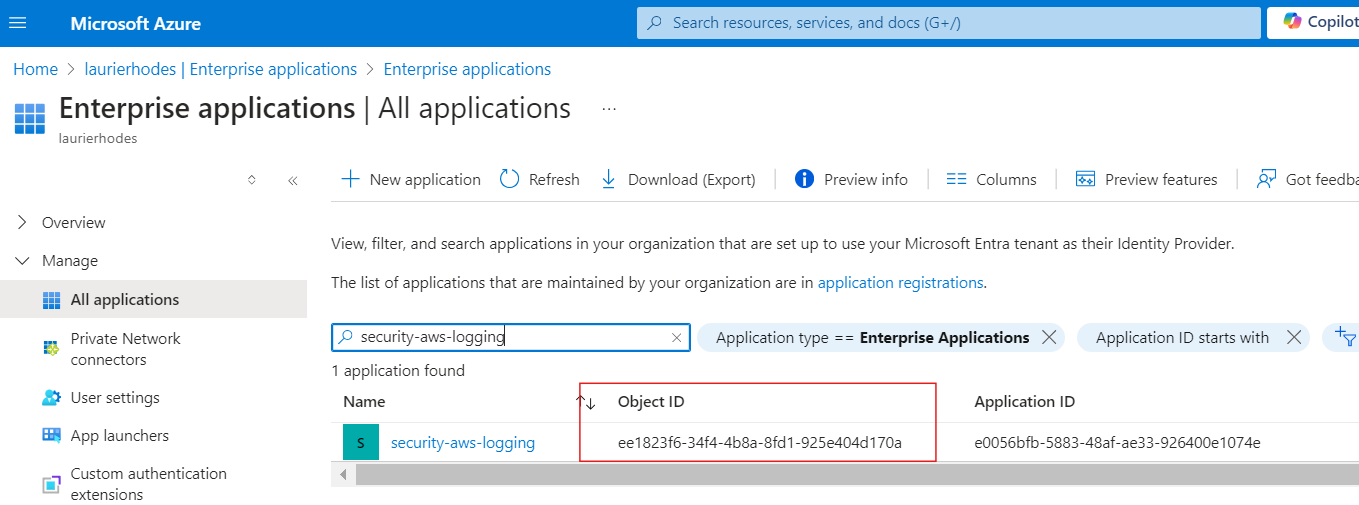
Search for the corresponding Enterprise Application by its name in Entra’s Enterprise Applications. This will help you locate the Service Principal. Copy its Object ID to notepad.
Next, navigate to the App Roles blade of the App Registration and copy the App Role ID to notepad also.

You should now have three key pieces of information needed to assign the Managed Identity to the AssumeRoleWithWebIdentity role created in your App Registration:
My example values are:
- serverServicePrincipalObjectId = ee1823f6-34f4-4b8a-8fd1-925e404d170a
- managedIdentityObjectId = 1ea7e6e0-7876-4d1c-aec5-7b1c927ede74
- appRoleId = 27dc233a-b082-415f-9369-e3b9aff01678
We will use PowerShell to make this assignment since it’s currently not possible to assign App Roles to Managed Identities through the Azure portal. Microsoft provides detailed guidance here: Assign App Roles to Managed Identities via PowerShell.
Install-Module Microsoft.Graph -Scope CurrentUser

Connect-MgGraph

<#  Microsoft Example

New-MgServicePrincipalAppRoleAssignment `
    -ServicePrincipalId $serverServicePrincipalObjectId `
    -PrincipalId $managedIdentityObjectId `
    -ResourceId $serverServicePrincipalObjectId `
    -AppRoleId $appRoleId
#>

New-MgServicePrincipalAppRoleAssignment `
    -ServicePrincipalId 'ee1823f6-34f4-4b8a-8fd1-925e404d170a' `
    -PrincipalId '1ea7e6e0-7876-4d1c-aec5-7b1c927ede74' `
    -ResourceId 'ee1823f6-34f4-4b8a-8fd1-925e404d170a' `
    -AppRoleId '27dc233a-b082-415f-9369-e3b9aff01678'
This will hopefully complete without errors.

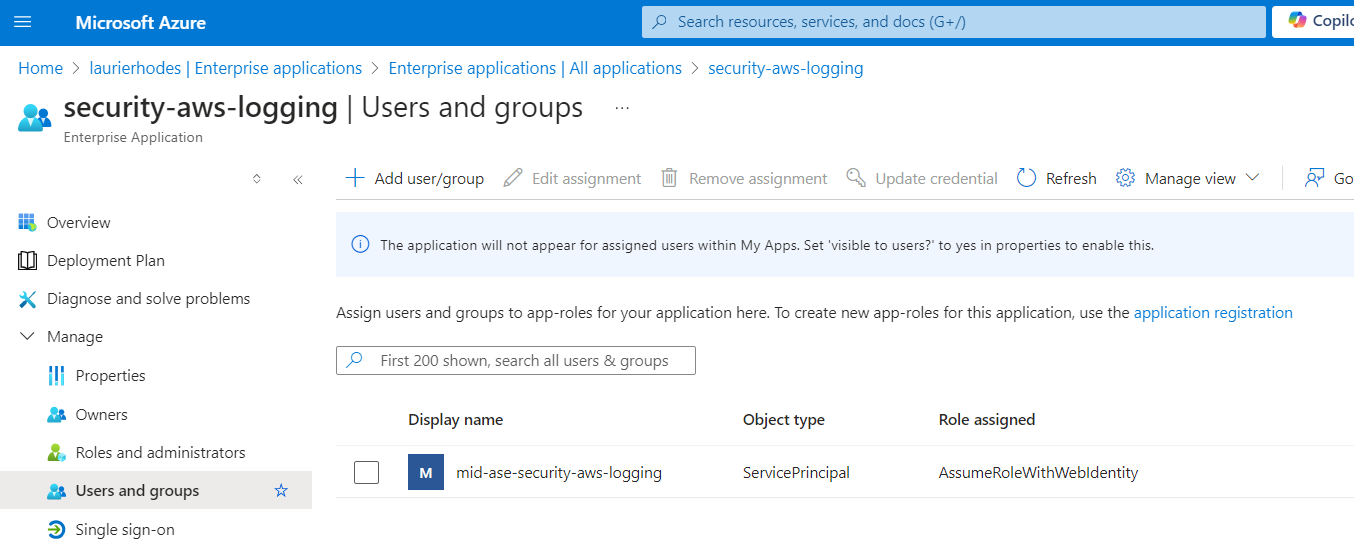
After running the script, verify that the assignment was successful by checking the Users and Groups blade of the Enterprise Application. The Managed Identity should be listed with the AssumeRoleWithWebIdentity role.
Step 4: Configure AWS
In the AWS Management Console, navigate to IAM and create an IAM Identity Provider for OpenID Connect.
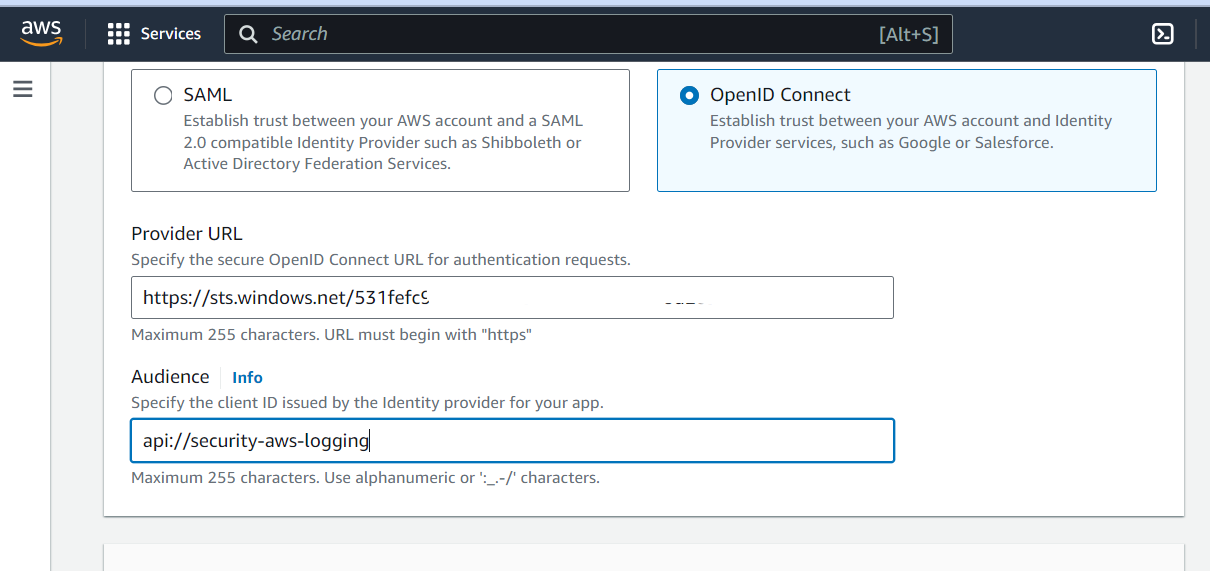
For Provider URL, use https://sts.windows.net/<Microsoft Entra Tenant ID>/, replacing <Microsoft Entra Tenant ID> with your Azure Tenant ID.
TAKE CARE TO ENSURE THE PROVIDER URL HAS A TRAILING BACKSLASH OR REQUESTS WILL FAIL!
For Audience, enter the Application ID URI you configured earlier in the App Registration.
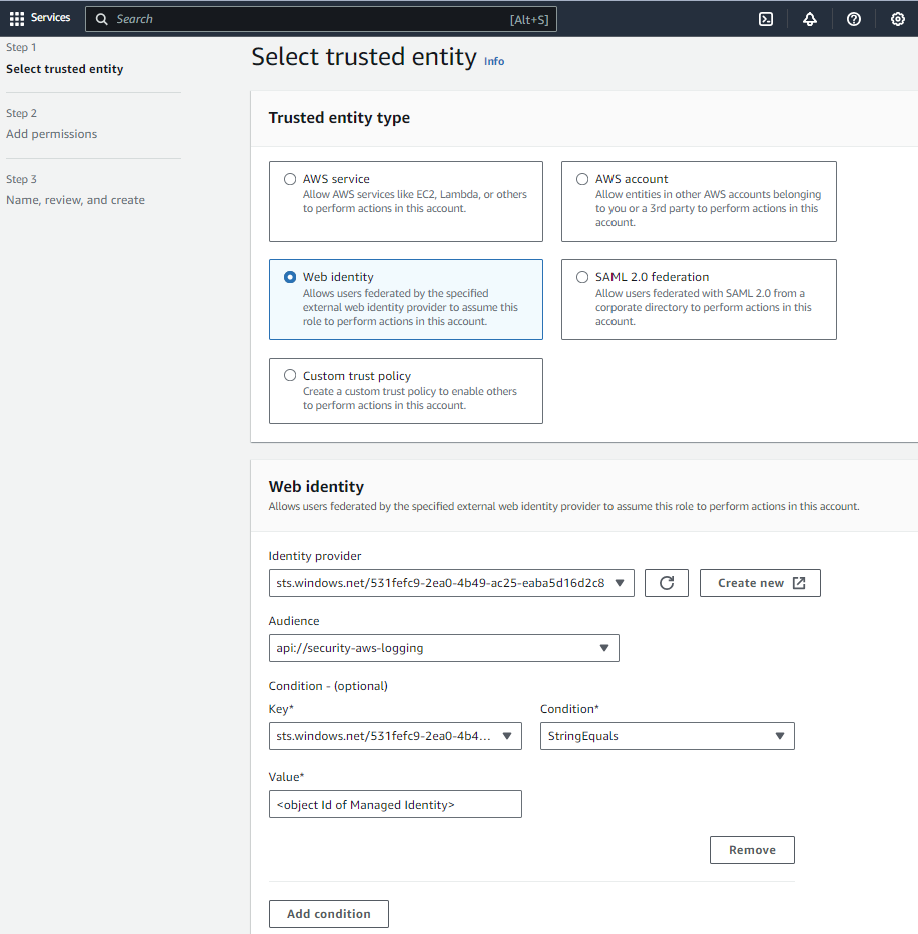
Add a condition for access to specify the object Id of the Managed Identity that will be making the claim.
Depending on what you intend to use the Function App for, you may like to also configure AWS service permissions at this stage.

Save the newly created role.
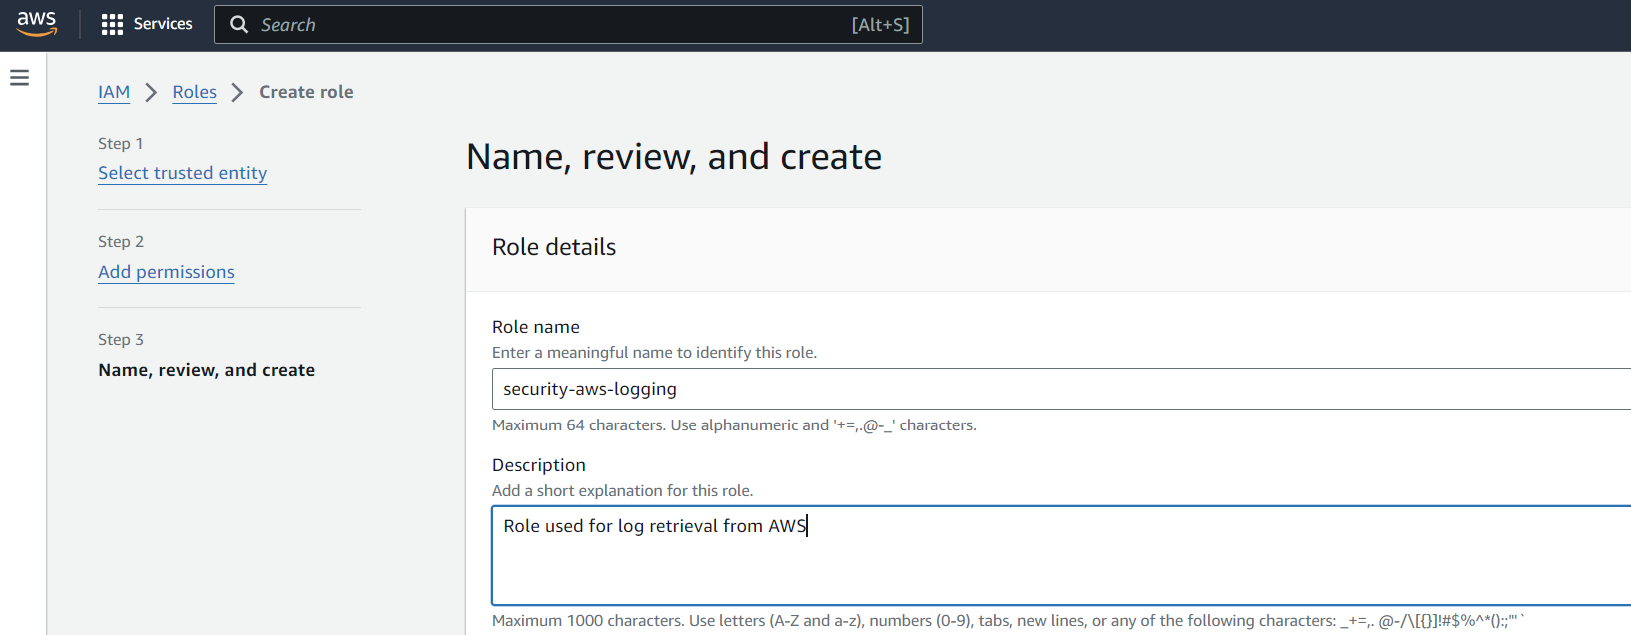
The JSON representation of the Trust relationship will be similar to the example below, Note that the "sub" array can hold multiple Managed Identity object Ids if required.
{
    "Version": "2012-10-17",
    "Statement": [
        {
            "Effect": "Allow",
            "Action": "sts:AssumeRoleWithWebIdentity",
            "Principal": {
                "Federated": "arn:aws:iam::XXXXXXXXXXX:oidc-provider/sts.windows.net/XXXXXXXXXXXXXXXXXXXXXXXXXXXXX/"
            },
            "Condition": {
                "StringEquals": {
                    "sts.windows.net/XXXXXXXXXXXXXXXXXXXXXXXXXXXXX:sub": [
                        "1ea7e6e0-7876-4d1c-aec5-7b1c927ede74"
                    ],
                    "sts.windows.net/XXXXXXXXXXXXXXXXXXXXXXXXXXXXX:aud": [
                        "api://security-aws-logging"
                    ]
                }
            }
        }
    ]
}
With this enabled, a Function App can use this Managed Identity to perform activities within AWS.
Note that I have seen it take up to two hours for role entitlements to become active on User Defined Managed Identities so be a patient with testing!
- Log in to post comments